The Brat Pack Blog Train

Pages

Monday, January 30, 2012

FTU Tutorial - Punkish Queen

This tutorial is of my own creation and any resemblance to any other tuts is purely coincidental. This tutorial is for personal use only, using it for monetary gain is against our TOU's.
This tutorial was written on January 30, 2012. This tutorial is copyrighted to Signature Collections Tutorials By Victoria and is registered with Tutorial Writers Inc.

Supplies Needed:
Tubes of your choice. I used Verymany Tubes art. You must have a license to use her art which you can get here: http://picsfordesign.com/
FTU Scrapkit called Roller Punks by Stefs Scrapkits.  You can find this kit here: http://stefs-scrapkits.blogspot.com/ . Thanks Stef!
Mask of choice. I used my mask# 74, which you can get here: http://mistressv-signaturecollections.blogspot.com/
Font of your choice.
 Let's begin shall we.
Open a new image,  600x600.
I used paper#01. Apply my mask#74. Merge mask layer visible.
Select frame#10, resize to (500x500). Copy and paste to mask.
Select paper#19, Resize to (400x400). Copy and paste behind frame. Erase any excess you do not need.
Select tube, resizing will vary. Copy and paste behind frame. Erase part of frame to make it look like tube is coming out of frame.
Select dangle01, resize to (200x380). Copy and paste to right side of frame on corner.
Select bow11, resize to (300x200). Copy and paste at bottom of frame.
Select cap2, resize to (200x200). Copy and paste to right side of tag on corner of frame.
Select skates02, resize to (200x212). Copy and paste to left side of tag.
Select teddy01, resize to (200x200). Copy and paste to left side of tag in front of skates.
Select bottle01, resize to (200x200). Copy and paste to bottom right side of tag.
Select bottle02, resize to (200x200). Copy and paste in front of bottle01.
Select flower03 and 04, resize to (100x100). Copy and paste randomly around the tag.
Add name, url, copywrite and watermark.

Merge all layers.
Resize, to the size you want your finished tag to be.

Save as PNG.
And woohoo, you are finished!
Thank you for trying my tutorial. I would love to see your results and would love to post them on my blog. Contact information is listed on this home page.
Smooches,
**Victoria**
©Signature Collections-Tutorials By Victoria
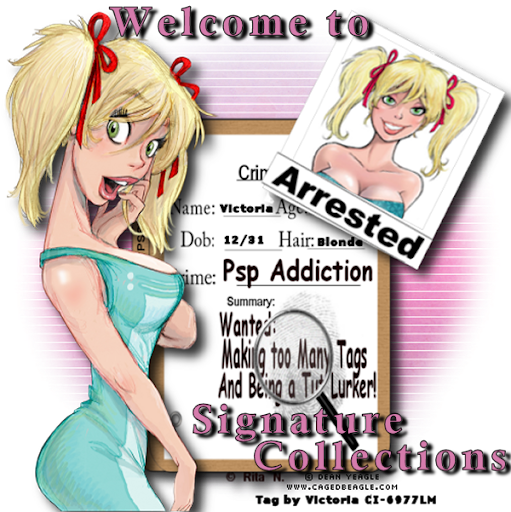

PTU Tutorial - It's A Crime

 
This tutorial is of my own creation and any resemblance to any other tutorial is purely coincidental. This tutorial is for personal use only, using it for monetary gain is against my TOU's.
This tutorial was written on January 30, 2012.
This tutorial is copyrighted to Signature Collections Tutorials By Victoria and is registered with Tutorial Writers Inc.

Supplies Needed:
Tube of your choice. I used Victoria Raber Tube art.
PTU Scrapkit called Sexy Biker Babes by NaughtyAngelzCreationz.  You can find this kit here:  http://www.scrapsandthecity.com. Thanks NaughtyAngel http://naughtys-creations.blogspot.com
Mask of choice. I used my mask#75, which you can get here: http://mistressv-signaturecollections.blogspot.com/
Plug-ins Xero – Bad Dream
Font of your choice.
Let's begin shall we.
Open new image 600x600.
I used paper#10. Apply my mask#75. Merge mask layer visible.
Select el#40, no need to resize. Copy and paste to upper center of mask.
Select fr3, resize to (500x400). Copy and paste to lower center of tag.
Select tube, resizing will vary. Copy and paste behind frame. Erase any excess of frame you do not need to make it appear that tube is coming out of the frame. Add drop shadow.
Select pp#3, resize to (400x400). Copy and paste behind frame and tube. Erase any excess you do not need.
Merge tube, frame and paper together. Add a drop shadow.
Select el#39, no need to resize. Copy and paste to bottom right side of tag. Add a drop shadow.
Merge together with frame.
Go to effects, plugins, xero, Bad Dream. Play with the settings until you find the look you want, then apply.
Select el#24, resize to (200x99). Copy and paste to upper left side of tag.
Add name, url, copywrite and watermark.
Merge all layers.
Resize, to the size you want your finished tag to be.

Save as PNG.
And woohoo, you are finished!
Thank you for trying my tutorial. I would love to see your results and would love to post them on my blog. Contact information is listed on this home page.
Smooches,
**Victoria**
©Signature Collections-Tutorials By Victoria

Tuesday, January 17, 2012

FTU Snag A Tag


Here are some snags for you. Just click on the image to bring up the larger size. The right click and save to your computer. Please so not re-size, alter or claim these snags as your own creation! Leave some love.

Monday, January 16, 2012

PTU Tutorial - Miss Purrr-fect


This tutorial is of my own creation and any resemblance to any other tutorial is purely coincidental. This tutorial is for personal use only, using it for monetary gain is against my TOU's.
This tutorial was written in January 16, 2012. This tutorial is copyrighted to Signature Collections Tutorials By Victoria and is registered with Tutorial Writers Inc.

Supplies Needed:
Tubes of your choice. I used the art of Barbara Jensen. You must have a license to use her art which you can get here: http://www.eroticartistgallery.com/
PTU Scrapkit called Jolie from Butterfly Kisses Scraps  You can find this kit here: http://bkscraps.blogspot.com/2012/01/new-ptu-kit-jolie.htmlThanks Deanna
Mask of choice. I used my mask# 79, which you can get here: http://mistressv-signaturecollections.blogspot.com/
Font of your choice.
Plug-ins Xero – Bad Dream
 Let's begin shall we.
Open a new image,  600x600.
I used paper2. Apply my mask#79. Merge mask layer visible.
Select circles, resize to (500x357). Copy and paste twice, one to upper right side of tag and again to lower left side of tag.
Select beads, resize to (500x125). Copy and paste to bottom of tag.
 Select frame01, resize to (600x438). Copy and paste to center of tag. Add a drop shadow.
Select tube, resizing will vary. Copy and paste behind frame. Erase any excess you do not need.
Select wingedheart, resize to (300x133). Copy and paste above the frame.
Select pin2, no need to resize. Copy and paste as if the pin is going through the heart.
Select flowers, resize to (300x167). Copy and paste twice, once to upper left side of tag and the other to lower right side of tag.
Select tube again, sizing will vary. Copy and paste full size tube to left corner of tag. Add drop shadow.
Add name, url, copywrite and watermark.
Merge all layers.
Go to effects, plugins, xero, Bad Dream. Play with the settings until you find the look you want, then apply.
Resize, to the size you want your finished tag to be.

Save as PNG.
And woohoo, you are finished!
Thank you for trying my tutorial. I would love to see your results and would love to post them on my blog. Contact information is listed on this home page.
Smooches,
**Victoria**
©Signature Collections-Tutorials By Victoria

PTU Tutorial - Vintage Beauty

This tutorial is of my own creation and any resemblance to any other tutorial is purely coincidental. This tutorial is for personal use only, using it for monetary gain is against my TOU's.
This tutorial was written in January 16, 2012. This tutorial is copyrighted to Signature Collections Tutorials By Victoria and is registered with Tutorial Writers Inc.

Supplies Needed:
I am using a beautiful tube by Keith Garvey. You must have a license to use his art which you can get here: http://psptubesemporium.com
PTU Scrapkit called Vintage Girls from A Taggers Scrap.  You can find this kit here: http://itsbacchus.blogspot.com/. Thanks Jo!
Mask of choice. I used my mask# 84, which you can get here: http://mistressv-signaturecollections.blogspot.com/
Font of your choice.
Plug-ins Xero – Improver
 Let's begin shall we.
Open a new image,  600x600.
I used paper#19. Apply my mask#84. Merge mask layer visible.
Select frame04, resize to (500x500). Copy and paste to center of tag. Add drop shadow.
Select background3, no need to resize. Copy and paste behind frame04.
Select fan, no need to resize. Copy and paste on top of background3 behind frame04.
Select corner, no need to resize. Copy and paste to left side of tag. Select again this time mirror image and paste to right side of tag.
Select tube, resizing will vary. Copy and place behind frame04. Erase any excess you do not need.
Select bottle, resize to (150x262). Copy and paste to bottom right side of tag.
Select bow1, resize to (500x265) Copy and paste to bottom right side of tag.
Select candle, no need to resize. Copy and paste to bottom left side of tag.
Select bag2, resize to (200x110). Copy and paste to bottom of candle.
Select brooch, resize to (100x82). Copy and paste to right side of bag2.
Select leaves, resize to (300x156). Copy and paste twice, one to bottom right side of tag and another to the bottom left side of tag.
Select envelopes, resize to (200x136). Copy and paste to bottom middle right of tag.
Select flower1, resize to (200x151). Copy and paste to right bottom of tag. Select again this time mirror image and copy, paste to left bottom of tag.
Select keys, resize to (100x75). Copy and paste at bottom center of tag.
Add name, url, copywrite and watermark.
Merge all layers.
Go to effects, plugins, xero, Improver. Play with the settings until you find the look you want, then apply.
Resize, to the size you want your finished tag to be.

Save as PNG.
And woohoo, you are finished!
Thank you for trying my tutorial. I would love to see your results and would love to post them on my blog. Contact information is listed on this home page.
Smooches,
**Victoria**
©Signature Collections-Tutorials By Victoria


Friday, January 13, 2012

PTU Kit - Bad and Worse

I made this tag using Ditz Bitz PTU Kit called Midnight. You can purchase it here.


Monday, January 9, 2012

PTU Tutorial - Timeless Beauty

This tutorial is of my own creation and any resemblance to any other tutorial is purely coincidental. This tutorial is for personal use only, using it for monetary gain is against my TOU's.
This tutorial was written January 9, 2012. This tutorial is copyrighted to Signature Collections Tutorials By Victoria and is registered with Tutorial Writers Inc.

Supplies Needed:
Tube of your choice. I used the art of Ismael Rac. You must have a license to use his art which you can get here: http://xeracx.net/store
PTU Scrapkit called I’m Yours from Butterfly Kisses Scraps  You can find this kit here: http://bkscraps.blogspot.com/2012/01/im-yours.html  Thanks Deanna
Mask of choice. I used my mask# 85, which you can get here: http://mistressv-signaturecollections.blogspot.com/
Plug-ins Xero - Porcelain
 Font of your choice.
Let's begin shall we.
Open new image 600x600.
Select paper# 02. Apply my mask#85. Merge mask layer visible.
Select heartdeco, no need to resize. Copy and paste twice, once to top of tag and the other to bottom of tag.
Select frame03, resize to (600x486). Copy and paste to middle of tag. Add a drop shadow.
Select paper02, resize to (400x400). Copy and paste behind frame. Erase any excess you do not need.
Select tube, resizing will vary. Copy and paste behind frame. Erase any excess frame to do not need to expose tube.
Select bow01, resize to (100x123). Copy and paste to upper left side of frame.
Select charm01, resize to (100x123). Copy and paste on top of bow01. Erase and excess you do not need to make it look like the charm is attached to the bow.
Select ribbon02, resize to (400x238). Copy and paste to right side of tag. Select again and mirror copy. Copy and paste to left side of tag.
Select tag01, resize to (200x120). Copy and paste to bottom center of tag.
Select beads, resize to (200x259). Copy and paste three times. Place them across the bottom of tag.
Select roses, resize to (200x197). Copy and paste to right side of tag.
Select rose01 and 02, resize both to (100x84). Copy and paste both toward middle right side of tag slightly behind roses.
Select bottles, resize to (200x236). Copy and paste to left side of tag.
Select petals, resize to (200x83). Copy and paste in front of bottles.
Select glass02, resize to (99x146). Copy and paste on top of petals.
Select shoes01, resize to (150x128). Copy and paste to the left off enter.
Select mask01, resize to (100x137). Copy and paste to far right side of tag.
Add name, url, copywrite and watermark.
Merge all layers.
Go to effects, plugins, xero, Porcelain. Play with the settings until you find the look you want, then apply.
Resize, to the size you want your finished tag to be.

Save as PNG.
And woohoo, you are finished!
Thank you for trying my tutorial. I would love to see your results and would love to post them on my blog. Contact information is listed on this home page.
Smooches,
**Victoria**
©Signature Collections-Tutorials By Victoria


Monday, January 2, 2012

FTU Mask #85

To save my mask, just click on image to get correct size. The right click and save to your computer. If you save, leave some love.


FTU Mask #84

To save my mask, just click on image to get correct size. The right click and save to your computer. If you save, leave some love.


FTU Mask #83

To save my mask, just click on image to get correct size. The right click and save to your computer. If you save, leave some love.


FTU Mask #82

To save my mask, just click on image to get correct size. The right click and save to your computer. If you save, leave some love.


FTU Mask #81

To save my mask, just click on image to get correct size. The right click and save to your computer. If you save, leave some love.